Nissan Sentra Service Manual: Fender protector
Fender protector
Fender protector : exploded view
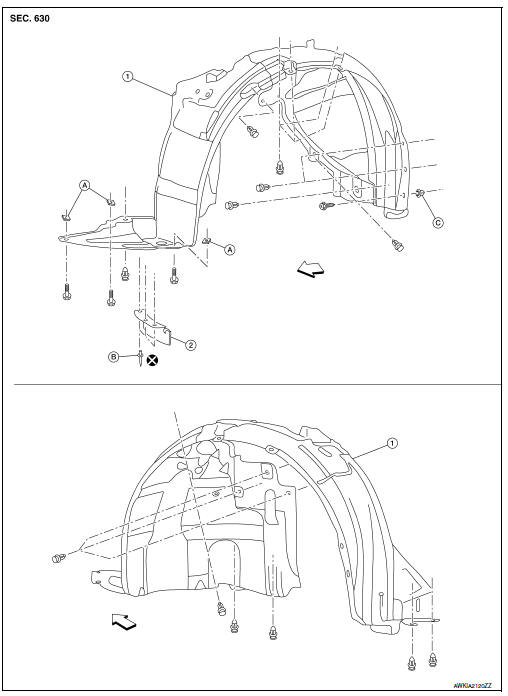
- Front fender protector
- Front wind deflector
- U nut
- Rivet
- Grommet
 Front
Front
Fender protector : removal and installation - front fender protector
REMOVAL
- Remove front wheel and tire. Refer to WT-47, "Adjustment".
- Remove front fender protector screws and clips
- Remove front fender protector from wheel house.
INSTALLATION
Installation is in the reverse order of removal.
Fender protector : exploded view
- Rear wheel opening molding
- Rear fender protector
- Clip
- U-clip
 Front
Front
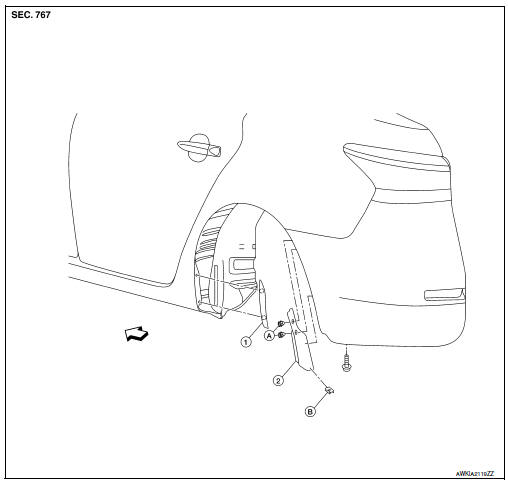
Fender protector : removal and installation - rear fender protector
REMOVAL
- Release the rear wheel opening molding pawls and remove rear wheel opening molding.
- Remove the rear fender protector clips, bolt and the rear fender protector.
INSTALLATION
Installation is in the reverse order of removal.
Rear wind deflector
Rear wind deflector : exploded view
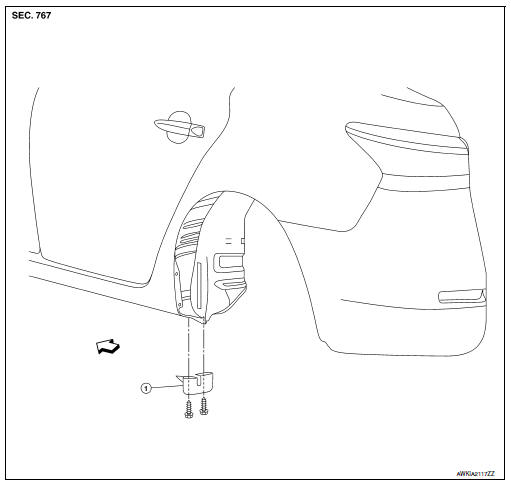
- Rear wind deflector
 Front
Front
Rear wind deflector : removal and installation
REMOVAL
- Remove the rear wind deflector screws and the rear wind deflector.
INSTALLATION
Installation is in the reverse order of removal.
 Cowl top
Exploded view
Cowl top seal
Cowl top grille cap
Cowl top cover
Cowl top extension
Cowl top extension insulator
Clip
EPT seal [t: 3.0 mm (0.12 in)
Cowl top cover cap
EPT seal [t: ...
 Under cover
Front under cover
Front under cover : removal and installation
REMOVAL
Remove front side of front fender protector (LH/RH). Refer to EXT-28,
"FENDER PROTECTOR : Removal
and Installatio ...
Other materials:
P0172 Fuel injection system function
DTC Logic
DTC DETECTION LOGIC
With the Air/Fuel Mixture Ratio Self-Learning Control, the actual mixture
ratio can be brought closely to the
theoretical mixture ratio based on the mixture ratio feedback signal from the
A/F sensors 1. The ECM calculates
the necessary compensation to correct th ...
P0011 IVT control
DTC Logic
DTC DETECTION LOGIC
NOTE:
If DTC P0011 is displayed with DTC P0075, first perform the trouble
diagnosis for EC-180, "DTC Logic".
DTC No.
CONSULT screen terms
(Trouble diagnosis content)
DTC detecting condition
Possible cause
P0011
INT/V TIM CO ...
Daytime light system inoperative
Description
The daytime light system is inoperative even though the combination switch
(lighting and turn signal switch)
and parking brake switch are in the normal setting, also whenever engine is
operating.
Diagnosis procedure
1.Check daytime light operation
Perform bcm(headlamp) daytim ...
