
Nissan Sentra Service Manual: Basic inspection
Diagnosis and repair workflow
Work flow
OVERALL SEQUENCE
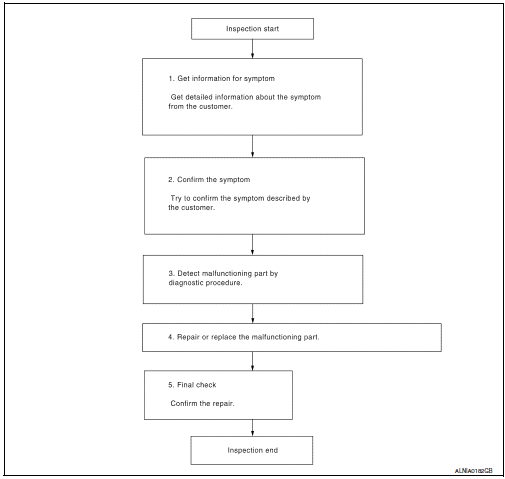
DETAILED FLOW
1.GET INFORMATION FOR SYMPTOM
Get detailed information from the customer about the symptom (the condition and the environment when the incident/malfunction occurred).
>> GO TO 2
2.CONFIRM THE SYMPTOM
Try to confirm the symptom described by the customer. Verify relation between the symptom and the condition when the symptom is detected.
>> GO TO 3
3.DETECT MALFUNCTIONING PART BY DIAGNOSTIC PROCEDURE
Inspect according to Diagnostic Procedure of the system.
Is malfunctioning part detected? YES >> GO TO 4
NO >> GO TO 2
4.Repair or replace the malfunctioning part
- Repair or replace the malfunctioning part.
- Reconnect parts or connectors disconnected during Diagnostic Procedure.
>> Go to 5
5.Final check
Refer to confirmed symptom in step 2, and make sure that the symptom is not detected.
Has the symptom been repaired? YES >> Inspection End.
NO >> GO TO 2
 Wiring diagram
Base audio
Wiring diagram
...
 Dtc/circuit diagnosis
Power supply and ground circuit
Audio unit
Audio unit : diagnosis procedure
Regarding wiring diagram information, refer to av-25, "wiring diagram".
1.Check fuse
Check that the following ...
Other materials:
Front wiper and washer system
Component Parts Location
BCM (view under instrument panel,
left side of vehicle)
Combination meter
IPDM E/R (view with air inlet duct
removed)
Combination switch (wiper and
washer switch)
Front wiper motor (with wiper cowl
cover removed)
Front washer motor (with front
bum ...
Precaution for Brake Control System
Always perform a pre-driving check to drive the vehicle.
Always check speed and safety while driving the vehicle.
To operate CONSULT while driving, more than one person is
required to be in the vehicle to avoid interference
to driving and ensure safety.
Slight vibrations ar ...
Diagnosis system (AIR BAG)
Description
CAUTION:
Never use electrical test equipment on any circuit related to the
SRS unless instructed in this Service
Manual. SRS wiring harnesses can be identified by yellow and/or orange
harnesses or harness
connectors.
Never repair, splice or modify the SRS wiring harness. ...
